Tent Buying Guide
Shopping for a tent is like shopping for a home: there are dozens of styles, designs, sizes, and features to consider. In this guide, gear editor Kristin Hostetter shows you how to pick the right one for any outing.
Tent Types
Tents fall into five basic categories:
- Summer/Screen
- Three-Season
- Convertible
- Mountaineering/Winter
- Tarp
Summer/Screen
These tents are designed for maximum ventilation and bug protection in steamy summer months. Good ones–with strong skeletal systems and full-coverage rain flies–can handle weather from moderate breezes to summer thunderstorms. Summer tents feature large swaths of mesh (as opposed to nylon), so when you peel back the fly, air flows freely through the shelter.
Three-Season
Aimed at keeping you dry and cozy in any conditions, from spring through fall, three-season tents are structured to handle strong winds (but not snow loads), and the walls are made from a combination of mesh and ventilation, which strikes a good balance between ventilation and protection.
Convertible
This type of shelter is aimed at campers who dabble in all types of conditions. It’s a hybrid design that features pole, vestibule, and rainfly options that allow you to strip it down for summer trips or fortify it for stormy adventures. Walls often feature mesh windows with solid nylon panels that can be zipped close when weather hits. The tradeoff for all that versatility is weight. These tents are typically heavier than other options.
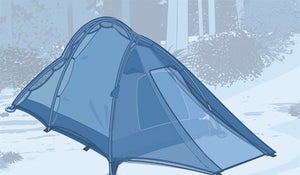
Mountaineering/Winter
With tough fabrics, sturdy pole structures, and plentiful external guy-out points (loops affixed at various key points on the tent’s fly), these tents are built for the harshest conditions. They typically have low, boulder-like shapes to help shed wind, and large vestibules for gear storage.
Tarp
Geared toward ultralighters who will sacrifice anything to save weight, a tarp is one solid sheet of nylon or polyester that can be rigged to trees, roots, boulders or trekking poles. Good knot-tying skills are essential to get the most out of this type of shelter and since there are no walls or floor and bug protection is sacrificed, but if rigged properly, tarps can be surprisingly weather-resistant.
Backpacker Tips: Selecting the Right Tent
When shopping for a tent, you’ll find a ton of specs and numbers, which can be confusing and often misleading if you don’t know how to analyze them. Here, our checklist for getting the most out of your money.
- Floor Space: When looking at floor space, check the dimensions, not just the square footage. Tall guys need a longer layout; stout hikers need more elbow room.
- Headroom: Total headroom will be dictated by wall slope (“hubbed” or short “eyebrow” poles often mean steeper sidewalls and better living space). Think about how many people you’ll be camping with and what kind of weather you might be dealing with. Think you might be tent-bound for days in bad weather? Tents with consistent headroom from end to end are great for foul weather card games. Concerned about weight? Ultralight designs–often low ceilinged or sloped at the foot–are better for sleeping than sitting.
- Shape: Aside from the square footage of your tent’s vestibule, consider the shape. High-roofed rectangular designs offer more dry storage and a safe place to cook in wind and rain. See more on shape below.
Tent Shapes
Tents come in several configurations; each shape has pros and cons.
A-frame
Simple, light, and often inexpensive, A-frame designs have sloping walls, which can limit head and elbow room. Because their broad sidewalls can get battered in high winds, A-frames are best for benign conditions.
Modified A-frame
This type of tent uses a center hoop pole, a ridgeline pole, or curved sidewalls to create more interior space and structural stability than standard A-frames.
Dome
Domes come in many shapes, sizes, and pole configurations, but typically feature arched ceilings, have good stability in wind, and good interior space.
Hoop/Tunnel
Hoop, tunnel, or tube tents offer a good combination of weight and weather-resistance but they are not freestanding, which means they require adequate staking to achieve their shape (see the Features section below).
Pyramid/Teepee
These shelters consist of a rainfly supported by a vertical center pole and are staked out to form a teepee shape. Space to weight ratio is excellent, but the floorless design means compromised performance in wet or buggy weather.
Wedge
Higher at the head end and lower towards the foot, wedge tents are aerodynamic (pitched low end into the wind) and lightweight. The tradeoff is that interior space is sacrificed, especially headroom.
Get to Know Your Tent
- Set Up Your Tent at Home: Don’t wait for your first trip to set up your new tent. Set up can sometimes be tricky until you become familiar with the way the poles fit together and connect to the tent body, and the last thing you want is to be fumbling around by headlamp with rain and wind howling in your face. Go through a few dry runs at home, so set-up becomes second nature.
- Seal the Seams: Make sure all the seams on your rainfly and tent floor are taped by the manufacturer. If not, you’ll want to apply seam sealer to prevent water from creeping into the stitch holes.
- Stakes? Check: Makes sure that you have plenty of stakes (plus a few extra) so that you’re able to secure all stake-out loops and guy-out points when bad weather hits. (The more stakes you use, the tauter the pitch, and a taut tent equals good weather protection.)
- Know Your Guy-Outs: Especially for convertible and mountain tents, identify all the guy-out loops on the outside of the fly and pre-attach guylines to each of these points. (Again, remember: this is not something you want to be fumbling with in dark, nasty conditions.) Guylines can dramatically increase the stability of the tent in big winds.
- Pad It: Consider making a ground cloth or footprint for your tent; it will protect the floor from abrasion. Dupont Tyvek material (available at most big home improvement stores) is a rugged, light, and cheap material. Just place your erected tent on top of a sheet, trace it with a marker, then cut a few inches inside the line. (Bonus Tip: You want the ground cloth slightly smaller than the tent’s actual footprint to prevent water from channeling underneath.)
Tent Features
Here’s the lowdown on the most common features you’ll find on tents.
Structure
- Freestanding tents can be erected without the use of stakes, which makes them easier to pitch and move around camp to find the perfect flat spot. (Note: All tents should be staked down to prevent them from blowing away, and to achieve maximum performance.)
- Non-Freestanding: These tents rely on stakes to create the structure, so pitching in sand and snow requires special attention. They’re typically lighter than freestanding tents and can often fit into tight spots.
Doors
- One: A tents with just one door is lighter than a double-door tent, but unless it’s positioned at one of the ends, one person will be crawling over the other to get in and out of the tent.
- Two doors really boost the comfort/livability factor of a tent, especially when each door is protected by its own vestibule; this allows each camper to have their own storage space.
Pole Material
- Fiberglass: These are found on inexpensive, light-duty tents. Compared to the other two types, they are cheaper, heavier, and less durable.
- Aluminum: The vast majority of good backpacking tents use aluminum poles, which are strong, light, and easy to replace.
- Carbon Fiber: Found on ultra-high-end tents, these are super-light and super-strong, but not as durable as aluminum. They’re also more expensive.
Pole Connection
- Sleeves: When poles feed into continuous sleeves along the tent body, a very solid structure is created that is best equipped to handle wind. But, setup can take longer and airflow between the tent body and the fly is impeded, so condensation can become an issue without proper ventilation.
- Clips: Setup is fast and easy with plastic clips that attach tent to poles. Airflow is superior, but stability in high winds is sacrificed.
Wall Construction
- Double-Wall: A traditional double-wall tent uses an inner canopy (to sleep in) and a rainfly (to keep water out). Double-walls tend to be less expensive, drier in wet conditions, and have better ventilation.
- Single-Walls use one layer of waterproof/breathable fabric, which makes them lighter and often easier to set up. Condensation can be a problem, so look for vents or a hybrid design (that uses a partial rainfly, often over the front door) to help reduce condensation.
Vestibules
A vestibule is like a mudroom or foyer–it’s where you make a pit stop to ditch wet boots and drop your pack before diving into the dry, inner sanctum of your tent. Vestibules are covered, but floorless, and they’re particularly critical in three-season tents, when you’ll likely be dealing with wet, sloppy weather. Some vestibule tips:
- Give Yourself Some Room: Look for one with enough head and elbow room that you can cook inside, if necessary. You can remain inside the inner tent, but there should be enough room in the vestibule to lay out a few pots, set up your stove, and fire it up without scorching any fabric.
- Check the Drip Line: When it’s raining you’ll often want to open the vestibule, at least partially, to allow some airflow. When rain drips from the top of the vestibule door into the vestibule space, will it end up inside your tent? Try to picture this drip-line–and avoid tents that have outwardly that will get wet inside when things start dripping.
Tent Anatomy
- Ceiling loops are great for hanging lanterns or lines for drying socks and clothes.
- Metal pole junctures called hubs add sturdiness and allow poles of different lengths to join. This cuts weight and helps pull the canopy outward to create vertical walls and more living space.
- Store small items (headlamp, ipod) in the tent’s inner pockets.
- Guylines provide extra stability in wind, rain, and snow. Attach them to guy-out loops, located along the perimeter and at key seams on the rainfly. Tip: Use reflective cords to avoid tripping in darkness.
- Found on double-wall tents only, the inner canopy (breathable and often made of mesh) lets moist air escape rather than condense in the tent. It also keeps bugs out.
- The rainfly–usually nylon and coated with polyurethane or silicon–should cover the tent body with a few inches of space remaining between it and the canopy to allow airflow. Some tents pitch in “fast-pack mode,” using just the fly and poles, to shave weight for trips in mild, bug-free conditions.
- Poles create the tent’s skeleton. Treat them with care: Never snap poles together (the ends can splinter), and when breaking them down, start in the middle to minimize tension on the shock cord.
- A waterproof bathtub floor curves a few inches up the tent’s sidewalls to prevent leaks in rainy weather. Ideally, the rainfly should overlap the floor’s perimeter by several inches.